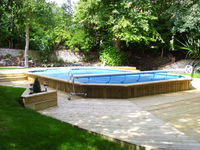
Folkpool 'EMPEROR' Pool installation
The Brief for the project was to install a pool into a woodland setting. The area of land for the pool was fully overgrown so needed some clearing before we could start.
A pool of this type must be set into the ground at least 60cm. The pool site was marked out, excavated and spoil was landscaped into the downhill slope beyond the excavation.
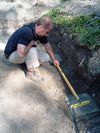
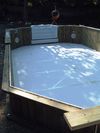
A Block foundation was suitable for this installation. The blocks must be levelled front to back and side to side and then to each other so the wall will be level all the way round. A concrete base can be used instead and although more costly than the block method, it has its advantages.
50mm 'Jablite' polystyrene sheets are cut into the wall panels to provide extra insulation.
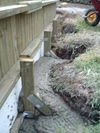
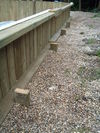
The Buttresses on this pool must be concreted in to provide the correct resistance against the water pressure from the inside of the pool. The Buttresses cover 3 sides of the pool in this instance, but this is not always the case.
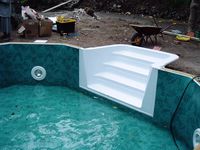
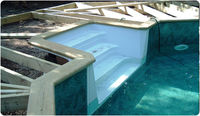
The Fittings for the pool (lights, Skimmer, return and the Uni-step) must first be marked out on the wood using the templates provided. Once marked cutting the holes are straight forward using a jigsaw. When the holes are cut the fittings can be installed, again a simple procedure.
The track in which the liner bead will locate is now cut, drilled and fitted to the top of the wall.
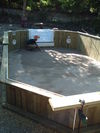
We then proceed to levelling off the base within the pool walls and then laying a 50mm 'Jablite' floor on top. The floor will be insulated, soft under foot and will protect the liner from any sharp stones. It will also help to give a wrinkle free pool base.
We stick carpet tape to the wall before we install the insulation foam which will protects and insulates.
We are now ready to fit the liner. Sweep the pool base, lay the liner out (it does help if it is a warm day, as the vinyl will be more flexible). Make sure the corners of the liner match the corners on the pool, then push the liner bead into the tracking (some stretching and manipulation of the liner is usually required). The liner is made specifically for the pool so should be an exact fit.
Cutting the fittings into the liner requires that there be enough water in the pool to stretch the liner into the bottom corners of the pool. The Uni-step and lights are the lowest fittings so as soon as the water level is high enough, the fittings are attached by first locating the screw holes behind the liner then screwing through sandwiching the liner and gaskets together to create a water tight seal, then we simply cut the liner from within the face plates. Then fit the light bulb assembly within the light recess.
Continue to fill the pool until the water level reaches approx 1-2" below the return fitting, again the method is to screw the face plate and gasket through the liner then cut the liner out using the inside face plate as a guide. Plumb the filtration up at this point before continuing to fill the pool. Then fill to below the skimmer, fit the face plate and gasket, then cut the liner. Fill to operating level.
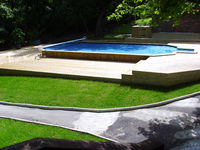
The Decking surround took approximately 2-3 weeks to complete.
The end result is a stunning 'Rustic' style Folkpool blending perfectly with the surroundings.

